Showing posts with label Bolt Action. Show all posts

Tuesday, 2 January 2018

Merry Christmas, Mr Lawrence! IJA Platoon completed


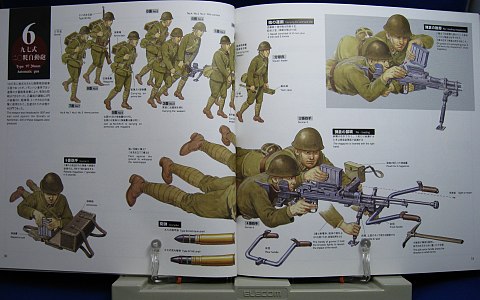
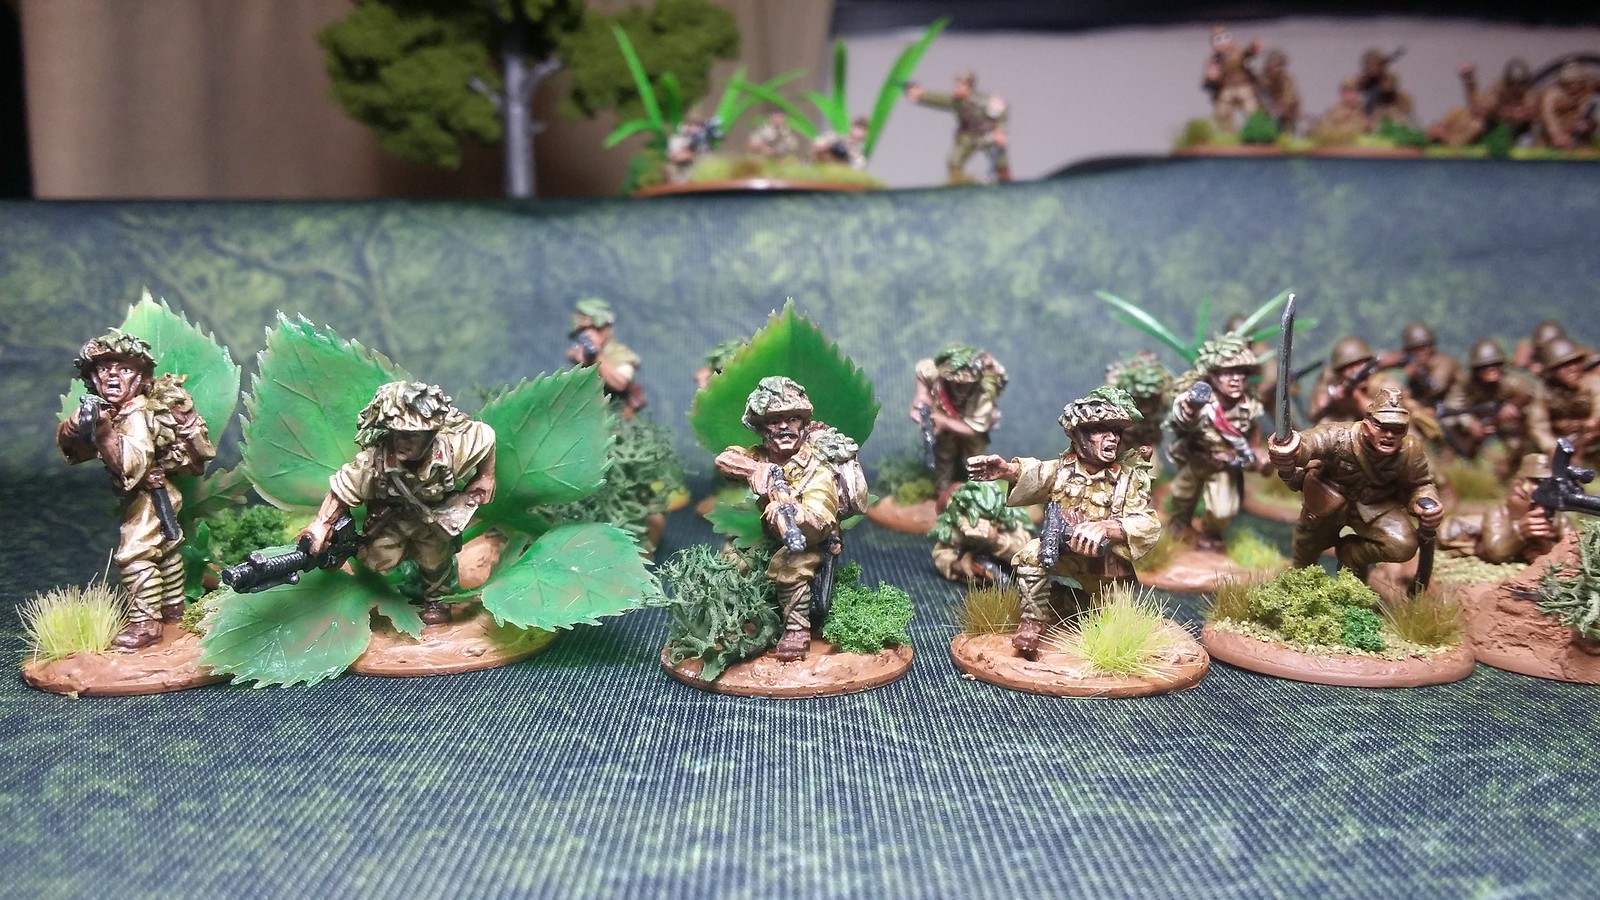
Here they are, my Imperial Japanese Army rifle platoon, completed after nearly six months work. I also managed to finish off an MMG support with a Kempeitai officer providing motivation in the field.

The figures are a mix of metal and plastic from Warlord, The Assault Group and Westwind. After completing a rifle and grenadier section in plastic I grew weary of fiddly multi-part plastic kits and switched back to metals.

Perhaps its part reactionary nostalgia, but I prefer metals. They cost more, sure, but they usually have plenty of character and spare me the tedium of assembly and filing. This means a quicker route to painting and therefore completion for the tabletop.

There was lots of experimentation in this platoon as it was my first World War 2 project. Colours went from very dark to a brighter scheme in order to make the drab modern uniforms pop up better on the tabletop. Of course, in real life drab colours which blend in with the landscape are ideal for uniforms, but they make for a poor visual feast.

Lesson learned, what is useful in life on the battlefield is a disadvantage in tabletop wargaming.


Second Lieutenant and Sergeant. The lieutenant's uniform 
is a blend of English Uniform and Russian Uniform greens.

If I ever have the energy to do another IJA platoon I may make the looks more homogeneous by having one all plastic with a brighter re-paint (I still have an untouched box from Warlord), and an all-metal platoon based on the jungle fighters.

For now, the plastic grenadiers and rifles can be the fire support while the metal chaps in shrubbery do the advance flanking.


White-gloved commander on the far right.

Rather than the more handsome and dashing Hiroo Onoda from Stoessi's Heroes, I went for the more imperious but dowdy commander from Warlord Games. Although too slim, he reminds me more of Lieutenant General Yamashita Tomoyuki, the Tiger of Malaya.

The sergeant is from The Assault Group, which have the second best faces after Warlord's jungle fighters, below.


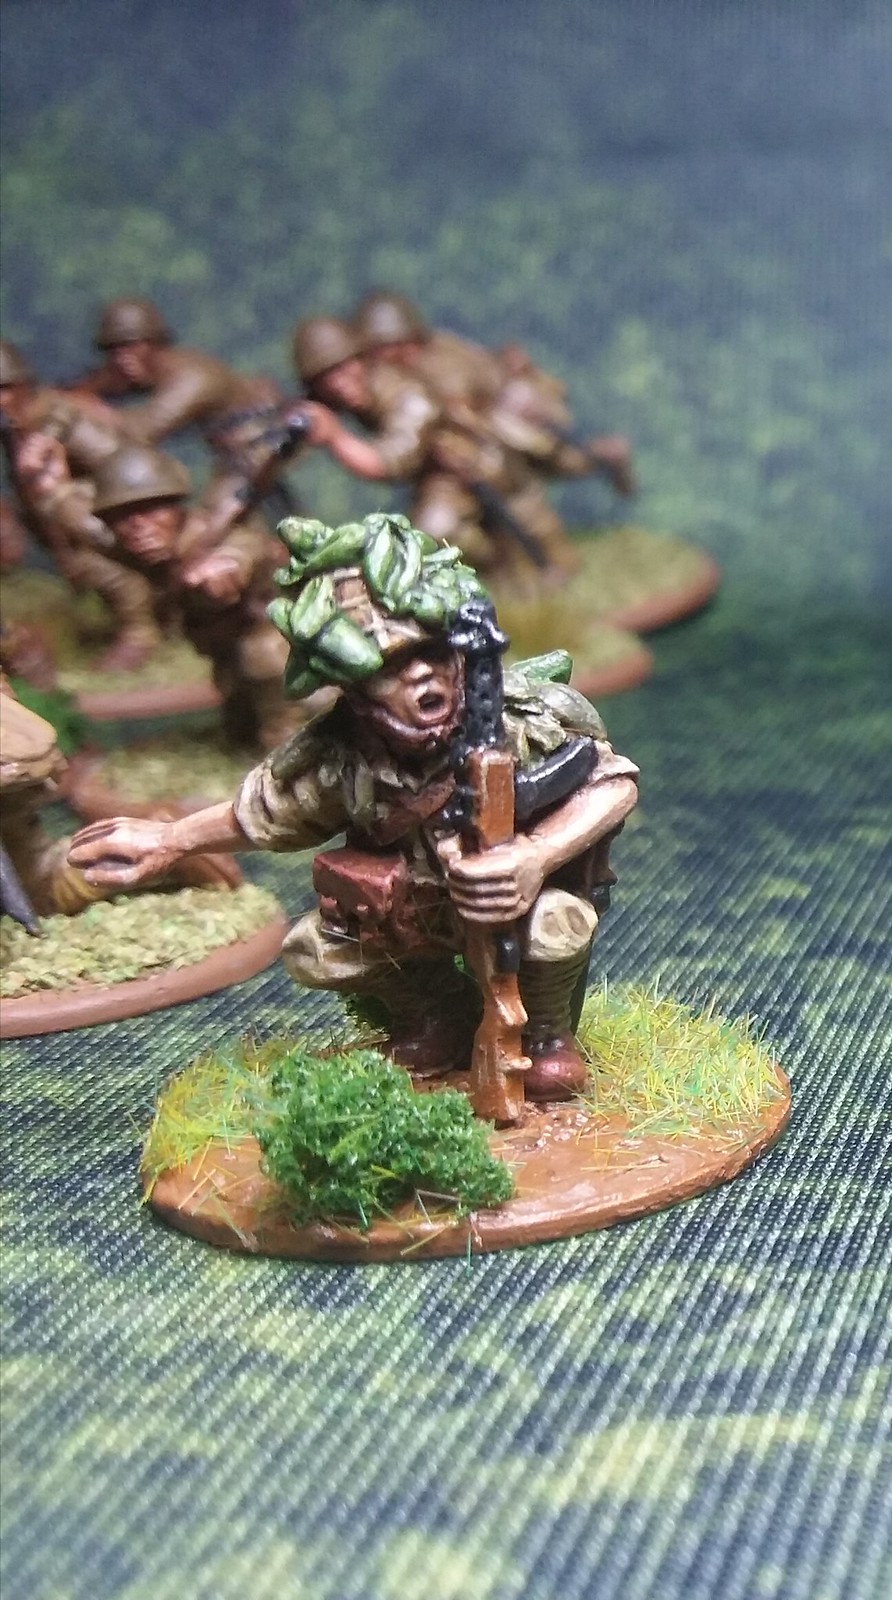
The Warlord plastics and the Westwind minis have very caricatured faces, reminiscent of the propaganda posters during the war. Some of the Westwind minis look like Asian vampires with their two widely-spaced fangs. That said, the metals blend together quite well. The section below mixes TAG with Westwind. I love figures with vegetation camouflage. They really offer points to brighten the model and add visual interest.


Plastic grenadiers with some minor conversions to conform better to a 45ยบ firing angle. They benefitted from delaying basing until the very end of the project. I acquired a DIY static grass applicator and I went a little overboard with it. I should leave a little more mud base showing in future. I've got some longer grass - 6mm and 10mm - on their way from Arcane Scenery to experiment with making my own long tufts and a far cheaper rate than pre-made ones.


I'm going to take a break from Japanese infantry for a while. Their platoons are nearly double the size of Allied ones and completing one amidst job and family commitments really tested my stamina.

Since the British players in my group have yet to have their platoons ready (mirroring history), I'm going to do some of the forgotten armies of the Commonwealth next so I can host complete games at home.

I've started work on a platoon of Argyll and Sutherland Highlanders with their distinctive pith helmets. These should be relatively fast to finish as the Perry Desert Rats are less fiddly than Warlord plastics and the khaki drill scheme is straightforward.

I'll probably follow up with some vehicles after, a Lancaster and a Ha-Go or Chi-Ha. Subsequent infantry will be some metal Indians that I am really looking forward to.

Wednesday, 26 July 2017

Band of Banzais

I wasn't happy with how the photos of my IJA LMG squad looked with a white backdrop under a daylight bulb so I reshot them on my Deep Cut Studios terrain mat. I think the green really brings out their banzai.


While I abhor the faces on the Warlord sculpts (reminiscent of the caricatured features found on anti-Japanese propaganda posters), the last picture really highlights how dynamic the poses are. There is a real sense of forward motion and commitment.

Monday, 24 July 2017

Bolt Action: Imperial Japanese Army Painting Guide

My IJA LMG section had their first day out last weekend with a try out of Five Men at Kursk

I'm building my Imperial Japanese Army initially for the Malaya campaign, with an eye towards later use in the South Pacific and the Sino-Japanese War. It'll be a rather long project, so this post is to remind myself what paints I used for the first lot. Hopefully others may find it helpful, too.

Nakanishi's Japanese Infantry Arms In World War II
I wanted my Japanese to have the green-hued uniforms that one can see in Osprey Warrior 95 Japanese Infantryman 1937-45 and Ritta Nakanishi's excellent, but hard to find, books on Japanese uniforms and arms.

Vallejo's Model Colour 923 Japanese Uniform WWII is rather yellow and didn't bear much resemblance to those reference pictures. There's plenty of debate on forums on whether it's useful or not, with the 'I don't care' camp largely favouring its usage. I've seen a few people mention that it's closer in colour to the uniforms used in the invasion of China in the late 1930s. It happens to be similar to the khaki worn by Chinese troops of that period, too.

Since there's a consensus that Japanese uniform colours varied over the course of the war due to supply issues and wear and tear, I think I have a pretty free hand within the khaki to green spectrum. I'll probably do at least one unit in Vallejo 923 for the China theatre, but the bulk will be in English Uniform green.

Yup, you read it right. After a week of research on the forums and half an hour eyeballing a full Vallejo paints rack at Wira Hobbies, it seems that Vallejo Model Colour 921 English Uniform comes closest. There's probably another hue, but my eyes gave out after a while and, as expected, the Army Painter Strong Tone would deepen the hue substantially.

Here's the paints that I used:

  • Basecoat, belt, shoes, ammo pouches, rifle stock: Army Painter Leather Brown Spray, edging highlights in 50/50 Vallejo Beasty Brown (a match for the base spray) and Foundry North African Flesh B
  • Uniform: Vallejo Model Colour 921 English Uniform, third highlights in 75/25 English Uniform and Pale Sand
  • Puttees, bread bags, webbing: German Camo Ochre Orange, third highlights in 75/25 German Camo Ochre Orange and Pale Sand
  • Rifle metal, bayonet scabbard: Black with highlights in Gunmetal Grey
  • NCO's shin gunto: based in black then Gunmetal Grey and highlights in Silver
  • Skin: Foundry North African Flesh B
  • Helmet, water flask: olive drab (VMC 921 English Uniform with a touch of black)


Colours are Vallejo unless otherwise stated.

Here's how they looked after the base colours were blocked in:


The uniform looks too bright, but here is where the Army Painter Strong Tone wash comes in. A good coating was applied all over the figure, with particular attention to guide the wash to settle in the appropriate creases.


After the wash dried for over 24 hours the figures had a nice rich olive tone, and a tad glossy. I was just using the wash, mind you, not the dip.

Even like this they looked pretty good, if you consider grubby to be good. I recently watched Oba: The Last Samurai, a biopic of IJA troops on Saipan who refused to surrender after the war was over. The actors looked really grubby with their clothes and skin darker than what I achieved above. At a certain point in the story they clean up and wash their kit and they resemble a light khaki. For my purposes, grubby is good, so this scheme seems promising.

I decided to press on with highlights to order to make the details pop out better. I went over the raised areas with the original base colour - English Uniform - for much of it, then touched up the very highest points with a 75/25 mix of English Uniform and Pale Sand. Some guides recommended 50/50, but that looked too bright.

I initially felt the highlights were too strong (under my daylight bulb), but they looked balanced on the games table. Here's the full Type B squad of 13 men with an LMG section.


Here's another shot of them out on their first foray in a learn-by-playing session of Five Men at Kursk.


I have to say that at the block colour stage I was getting bored out of my mind painting the figures in their dull, muted schemes. How I longed for the brightness of ancients! But after the wash and final touches I feel enthused to finish my platoon project.

Still remaining:
2 x IJA LMG sections
1 x IJA grenedier section
1 x MMG section
headquarters
Type 97 Chi-Ha

I'll ordering a few more top ups to round out the forces for a variety of theatres and historical battles, but it does feel achievable. It's also got me motivated to make progress with my 28mm ancients. While the WW2 project is a collective endeavour, 28mm ancients doesn't appeal to most local players and it's largely a labour of love on my part.

Wednesday, 5 July 2017

Bolt Action: IJA Platoon Organisation


Warlord's Build An Army deal offers a very good start on building a 1,000-point Japanese Bolt Action force that follows historical dispositions. I picked an HQ, two boxes of IJA plastic infantry, an MMG section, and a Type 97 Chi-Ha tank (free!). The Kurogane 'jeep' is mandatory. It's not terribly useful for my preferred theatres, but it's a cute model and I'm happy to have it.

In retrospect a better deal would have been to pick two boxes of SNLF marines for the same price because the sprues are the same as the IJA, except that they come with alternate metal heads and two metal figures. Still, I've no plans right now for any SNLF action.

With the two boxes of 30 plastic infantry and the metal HQ pack one can build up a standard 'Type B' single rifle platoon comprised of a HQ, three rifle sections and a grenadier section with about eight infantry left to be used as a bugler, banner bearer, and a sniper or command followers.

Following historical practice I'm stumping up the 20 points for an LMG in each of the three rifle sections. In addition, I'm following the proportions for one grenadier section to every three rifle sections. Models are plastic unless otherwise noted.

Platoon Headquarters: 2nd Lieutenant, Regular (metal) + liaison sergeant [60 pts]
1st light machine gun section (13 men): NCO, LMG, 11 riflemen [150 pts]
2nd light machine gun section (13 men): NCO, LMG, 11 riflemen [150 pts]
3rd light machine gun section (13 men): NCO, LMG, 11 riflemen [150 pts]
4th grenadier section (13 men): NCO, 3 grenadiers, 9 riflemen [205 pts]

The rest of the units are assorted to taste depending on the scenario. Here's an initial loadout:

Medic: Medic, Regular (metal) + follower [33 pts]
Medium Machine Gun Team (metal) [65 pts]
Sniper section: sniper + spotter [50 pts]
Tank: Type 97 Chi-Ha [135 pts]

Comes to 998 points.

I kicked off my project first with a 13-man LMG section as the group is using Operation Squad as a transitional step to Bolt Action games.

Here they are, all assembled, ready for painting.


I put a bit of extra effort to sculpt a dug-out base for the LMG gunner. It's based on an illustration in Ritta Nakanishi's Japanese Infantry Arms in World War II.